
Not one of the three automotive-style tank gauges on my boat works, and apparently this is not an uncommon problem among boaters.
Having already run out of fresh water a couple of times, I’ve given up trying to find the water level by rapping the aluminium and listening for a change in sound, or by feeling for a change in temperature. No, for this tank an accurate gauge is a must. While there are sophisticated tank monitoring systems available, the real problem isn’t cost, it’s how to install them.
For boat builders, easy access to tanks is a final consideration, if it’s considered at all. Since they put them in as the boat is being constructed, tank location poses no problems for the builder. However, the hapless owner can usually see only one face, whereas gauges generally require insertion through the top.
Since my boat is no exception, being unwilling to cut a hole in the carpeted floor ruled out just about any commercial product. Fortunately, as I sat in the bilge and pondered the dilemma, a small eureka moment occurred when my gaze settled on the sight gauge on the fuel tank. Why not make one for the water tank? It was quick, easy, and cheap. More important it’s accurate and idiot proof. Here’s how to do it in under an hour, plus a bit of shopping time.
Getting Started
Every fresh water tank has a hose fitting at the very bottom of the accessible face. This is where the pump draws water. It almost certainly also has a shut-off valve, but not to worry if yours is the exception, because the water flows surprisingly slowly and you can stop the flow very quickly.
Start by determining the internal diameter of the hose between tank and pump, then choose where you want to position the vertical tube so that it is easy to see and easy to secure. That decision will establish the length of tubing required, and it can be as long as you like without affecting performance.
Head to the Store
Once you know the diameter, purchase a plastic barbed T, a plastic barbed in-line shut-off valve, a piece of clear plastic tubing to fit the T and about a foot longer than required to reach from the bottom of the tank to just above its top, and hose clamps. I bought everything at a garden sprinkler supplier for about $10, but a big-box store should do as well. A small quantity of mineral oil safe for human consumption will lubricate the plastic barbs and make it much easier to push them into the hoses.
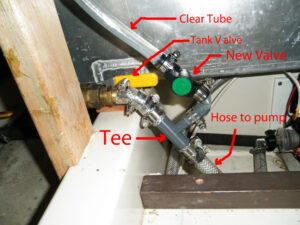 Diagram of the water level gauge.
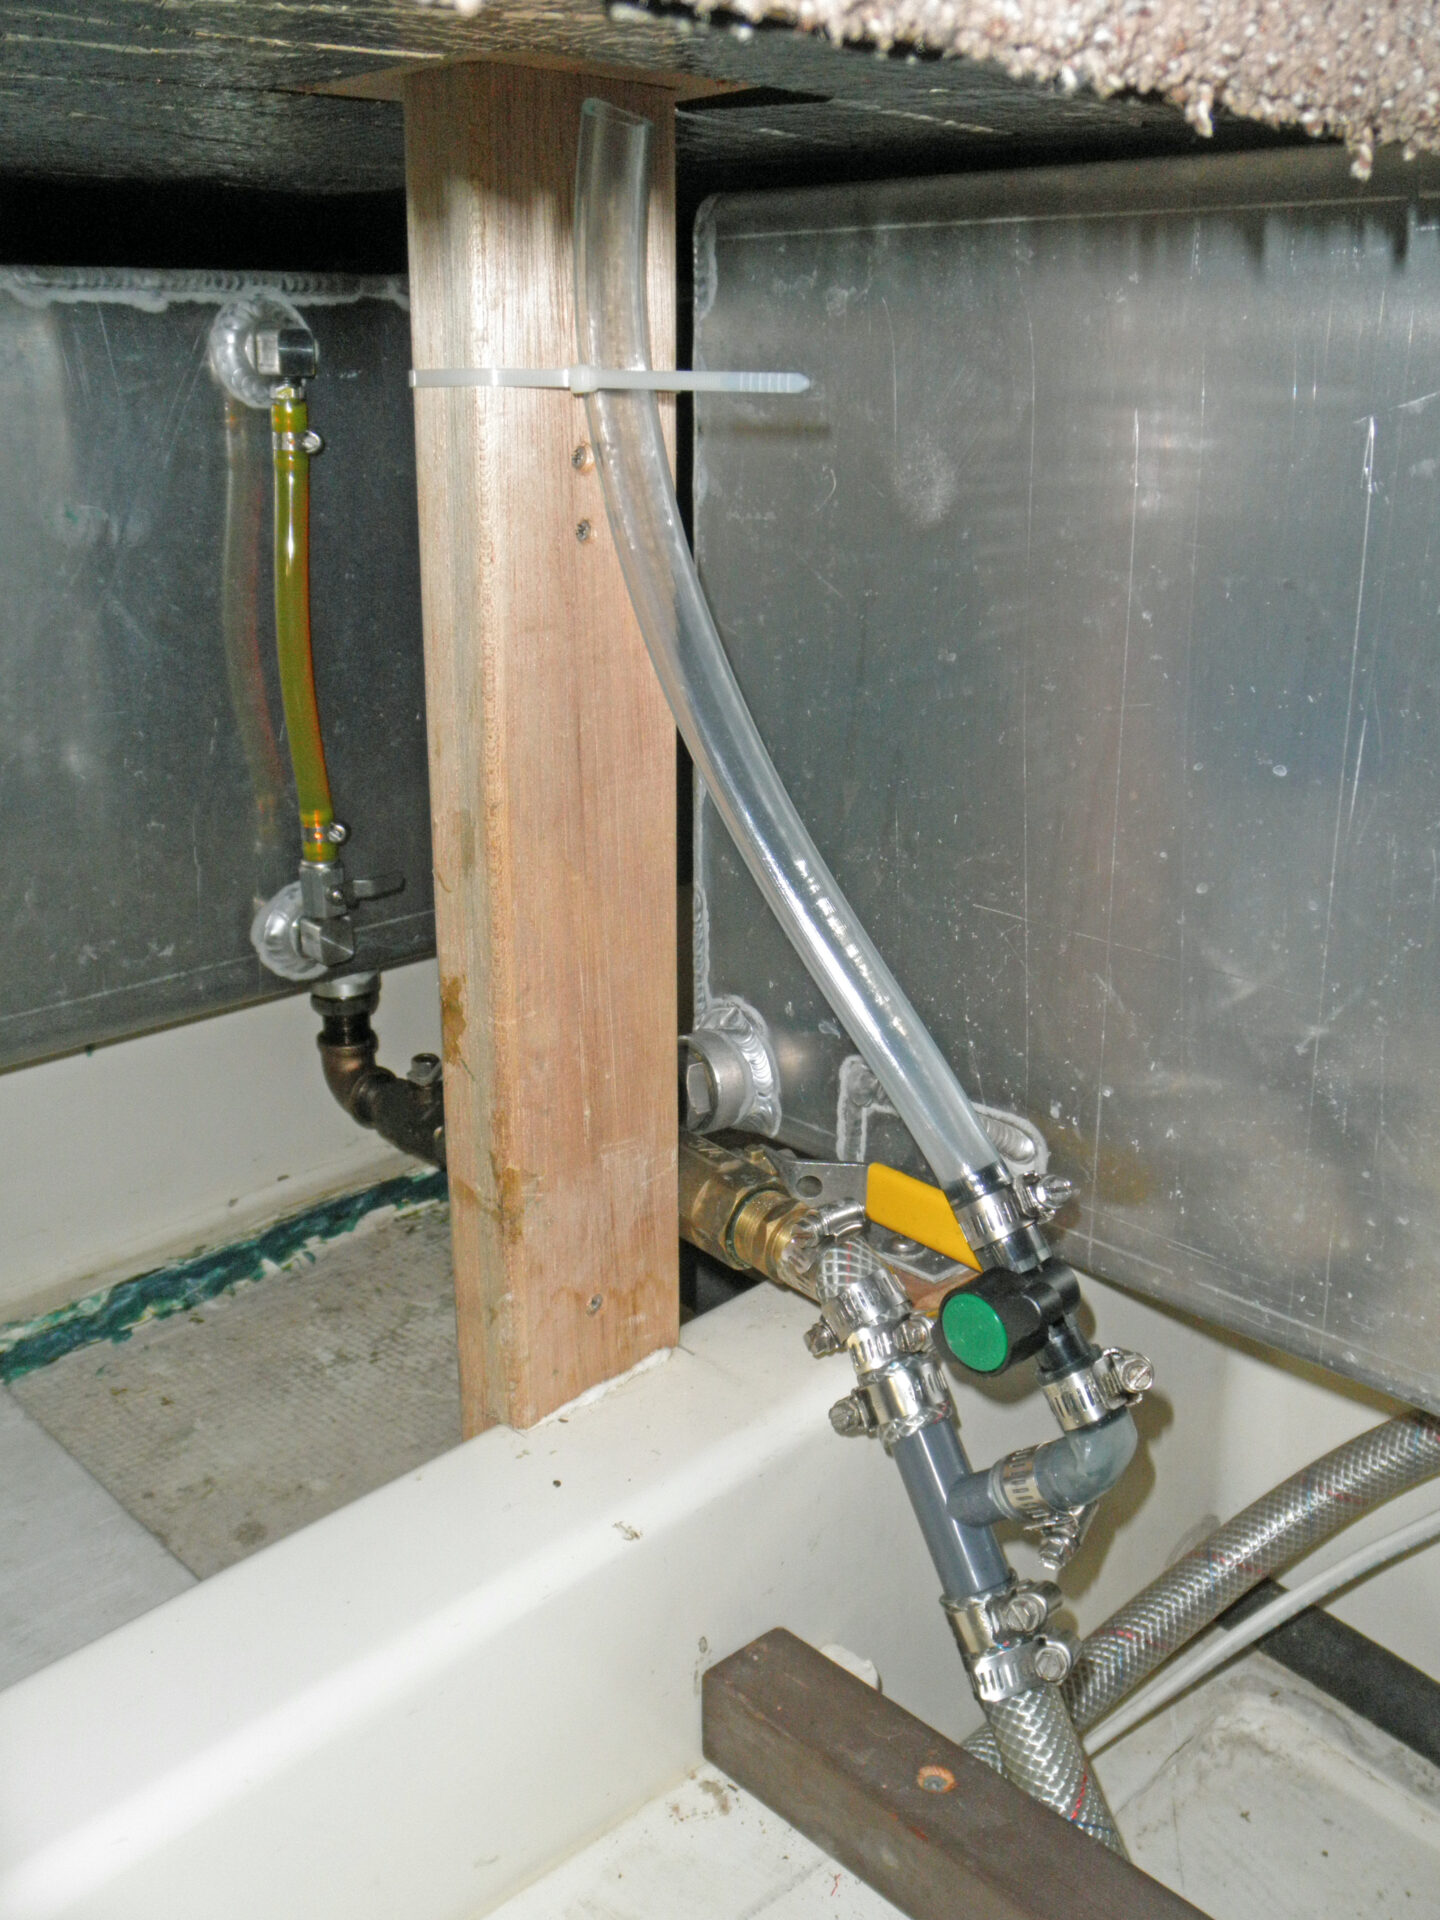
Installation is a breeze unless you’re in a really cramped position. Turn both the tank valve and the fresh water pump off. Cut a short piece of clear tubing and push it onto a barb on the new gauge valve—all connections should have two hose clamps with the screws offset to each other—and push the other end onto the 90° barb of the T. Now, cut the hose that links tank and pump wherever you’ve chosen, and insert the T to re-connect the cut ends. Push the remaining length of clear tube onto the gauge valve, and tighten all clamps. Finally, secure the loose tube end—I used a zip tie—and trim it so the open end reaches above the tank.
To check the water level, open both the tank and gauge valves, turn the pump on, and watch the water fill the tube to the same level as in the tank. While there’s no real need to have a valve at the top end, you can put one in if you wish. Just make sure to open both when checking the level.
While it’s much more satisfying to have the tube perfectly straight and true—having looked at my photos I’m going to go back and make mine plumb—it will do its job perfectly even at an angle as in the picture below. (Note the inspirational fuel tank sight gauge in the background.)